Hello, friends, I hope all of you are enjoying your life. In today’s tutorial, I am going to explain How to Make DC Power Supply Using Proteus. DC power supply is the basic project that every electronic engineering student makes during his engineering. DC power supply is also used in almost every project to provide input supply to the circuitry. In this post, we will discuss in detail how to make a dc power supply and its practical implementation.
For the construction of the power supply, I will use proteus software I hope you all are aware of this software it is commonly used in electronic and engineering programs for the simulation of different project circuits. So let’s get started with the How to Make DC Power Supply Using Proteus.
How to Make DC Power Supply Using Proteus
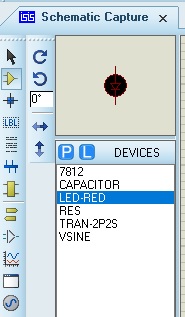
- 7812
- The components used for this project are listed here.
- AC voltage source, it denoted as VSINE.
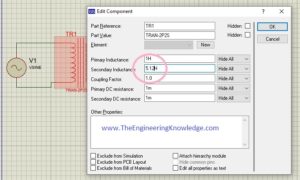
- Transformer it will step down the voltage provided by the AC input supply.
- The capacitor of rating 2200uf
- The resistance of one kilo-ohm
- Ground
- DC voltmeter
7812
- In this project, there is a component used that is denoted as 7812 it is a voltage regulator. It is available in integrated circuit packaging.
- This module belongs to the 78xx voltage regulators family it is easy to use and less expensive. In the name of this module, the last two digits tell about it will regulate the voltage to 12 volts.
- From the name of this module, you can observe that we will convert 220 input AC supply into 12 volts DC supply.
DC Power Supply
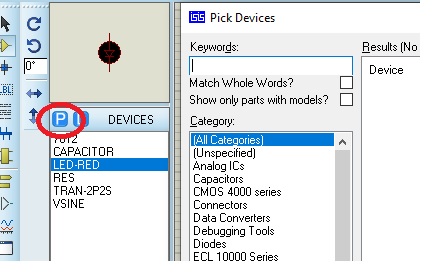
- To construct a dc supply in the proteus select all components mentioned above for a selection of components click on the ‘P’ button shown in the given figure and type the name of the corresponding component and select it.
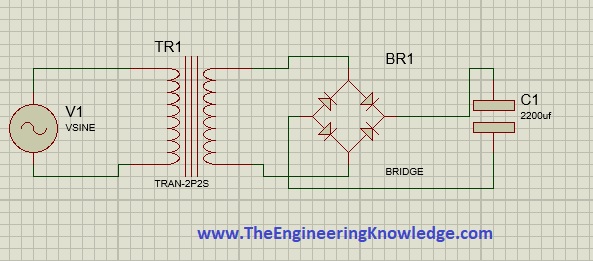
- After selecting components for projects connect them with each other.
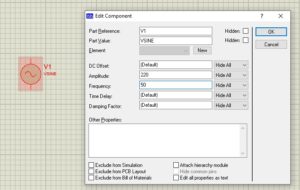
- In this project set value for AC source 220 volts and the frequency is 50 hertz as you can see in the given figure.
- After that connect the bridge circuit with the transformer secondary winding that will rectify AC output of the transformer into DC after that connect the capacitor of 2200uF with the bridge circuit.
- Now connect the voltage regulator 7812 with the circuit that will convert the output of the rectifier into 12 volts. Also, connect the red led and one-kilo ohm resistance with the voltage regulator as output.
- In the given figure, you can see the resultant circuitry.
- As you can see in the above figure the complete circuit of the dc supply is simulated now connect the DC voltmeter across the led to see the dc output voltage which will be 12 volts.
- In the given figure, you can see the complete working circuit dc power source and 12 volts DC output voltage.
What is a Voltage Regulator?
The voltage regulator is an electronic device used for maintaining the value of voltage at output irrespective of the value at input. It operates as a buffer between load and power supply and provides the constant voltage required to connect the load
Introduction to 7812 Voltage Regulator
- The 7812 voltage regulator is a linear voltage regulator IC. it belongs to 78XX’s reliable and simple structure device. 78 in its name is series and 12 is the output voltage that it provides. The regulator is created to a voltage value from 14 volts to 35 volts at the input and offers 12 volts at the output
Features of the 7812 Voltage Regulator
- Regulation at Output: it maintains the voltage at output with the changes at input volts
- Overcurrent and Thermal Protection: it has a protection circuit to prevent the high curent and temperatures
- Short-Circuit Protection: it comes with short circuti layers that protect it from getting damage
- Low Voltage loss: The voltage for this component is less and ensures high-efficiency power transformation
- Current Limiting circuit: it has current limiting operations that provide protection to connected components and regulators if there is a high current
Troubleshooting Common Issues with the 7812 Voltage Regulator
- Overheating: Try to control teh high voltage and then the regulator rating and not have high input. Heatsinks are used to save it from overheating
- Output Voltage variations: There must be voltage stable at the output and check the loose connection, error components, and wiring issues
- No Output Voltage: Again check teh input volts and load conditions, and it the use of multimeter confirms the regulator is not faulty.
Tips for Choosing the Right 7812 Voltage Regulator
- Input Voltage: Confirm that the input volts of regular is according to the rating value
- Output Current Rating: Use teh regulator according to the higest current given to load demands
- Package Type: There are different types of packaging for 7812 areSOT-223 TO-220, and DPAK. Use certain packaging according to use and PCB board layout.
How to Connect and Use the 7812 Voltage Regulator
- First of all, define the input and output pins of the regulator.
- Connect the input pinout with the positive terminal of the power source.
- Connection ground pin with the negative of the battery
- Make a connection of the output pin with the positive load that connects to the regulator
- Try to control the voltage values less then 35 volt to save regulator from damage
Friends it is a detailed post on how to make a DC power supply in Proteus, I have explained each and every step to construct this project in detail. If you have any queries about this project ask in comments. I also have uploaded a video of this project you can also see this video tutorial for further understanding. Thanks for reading. See you in the next tutorial.




helped me a lot , i was given the same end sem project. your post helped me alot
what if we want 9v output?
use LM7809
Think back for your own most successful item of content. Now think of all the additional approaches you could send this message. Would it not work like being a video clip? For an Info-graphic? Just as a more white paper or manual? To get a more thorough collection of shorter posts?