Hello reader welcome to the new post. In this post we will learn How to use Shift Registers in LabVIEW. If you are working a project where you have implemented loops and need to use already used data for your projects then shift register will be helpful to use that previous used data.
The structure of the shift register is such that at loop right portion upward arrowhead exists and this point helps to stores of data when applied iteration ends. This data at this point will move to another or downward arrow. This data reached at left point work as starting numbers and then all iteration again applied. and when move to again the upward point or right our process will end.
Now we will make simple projects to learn the practical understanding of shift register in LabVIEW.
How to use Shift Registers in LabVIEW
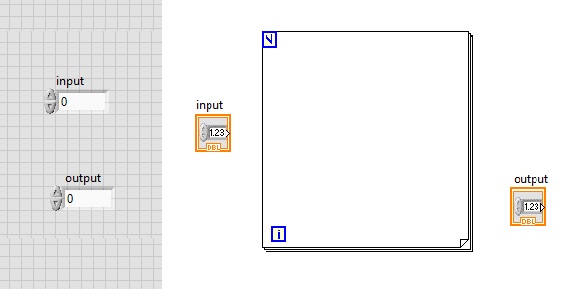
- For making project move to block diagram press right select the structure and place for loop in the block diagram.
- With that move to the front panel and select the two numeric control through pressing right then numeric and numeric control.
- The final interface will look like this you must select the two numeric control one is input and the other is output
- Now press right at the N point of for loop and select the create constant and write number 3 as constant can see here.
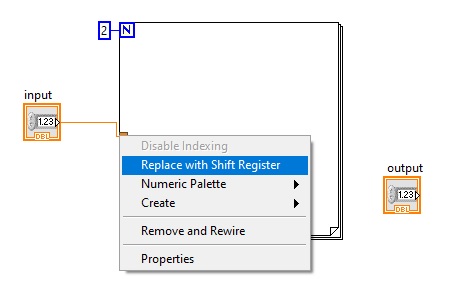
- After that input, control connect to the loop and press right at the joining point and select the replace with a shift register.
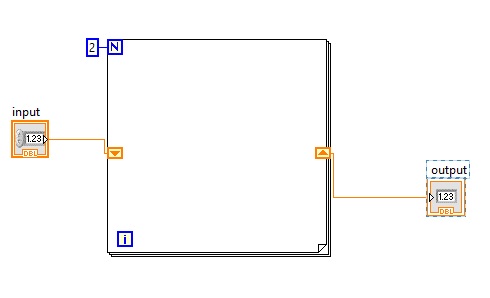
- The final look of project will we like this as can see here.
- Now connect the output indicator to another shift register as shown here.
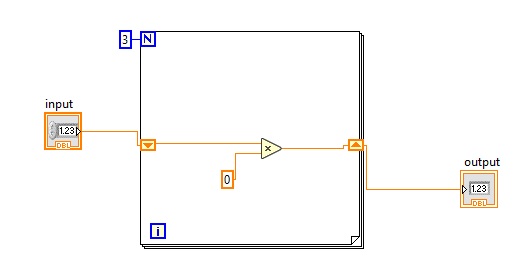
- Now select the multiply tab through numeric option in block diagram.
- With that also choose the DBL numeric constant and place these buttons in the for loop and make a connection according to blew figure and assign 5 to DBL numeric constant.
Move to block diagram and run the program then you will see the result is 192
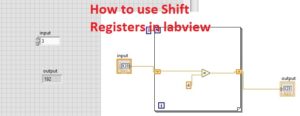
- So now get a detailed overview of how can shift register work
- In for loop iteration value is 3 so our program will operate three times.
- At the start input value is that is 3 will multiply with 4 and the results will be 12 and this number moves a shift register.
- When the second iteration comes values send at the right register that is 12 move to left register and will multiply again constant that is 4 and the result is 48
- This 48 will move to the right register and for 3rd iteration comes to the left register and comes to left shift register and apply three iteration and the result will be 192
- Since loop is finished due to 3 iteration selected and stopped to run and 192 our output will show in the indicator.
- The mathematical formula for this simple VI is:
Result = ( ( ( ( Initial * 4 ) * 4) * 4 )
That is all about the How to use Shift Registers in LabVIEW. I have explained each and every parameter related to this project with the details if you still have any further query ask in the comments. Thanks for reading have a good day see you in next post.


