Hello, readers welcome to the new post. Here we will discuss Introduction to Property Nodes in LabView. Property nodes are helping to make our projects healthful and work in a good state. These nods assist us to regulate the features of front panel components like position, display colors, etc.
For instance, we can vary the color combination of dials like green red, and blue according to the desired condition. We can also change the animation scheme of a display by using the different symbolization representations in the property nodes. So let get started.
Introduction to Property Nodes in LabView
- Let get started to have detailed understating of property nodes for a move to front panel press right select the boolean and then the push button palce in teh front panel and its resultant can see in block diagram
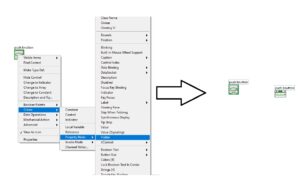
- After that move to block diagram and press on right on the tab then move to carats and property node and choose a visible option.

- In above figure, you can see that different types of property nodes perform different functions and properties according to their uses.
- This visible tab will help us to vary the visibility of our created project. Here i want to note that all property nodes are set in reading mode means their values can not change.
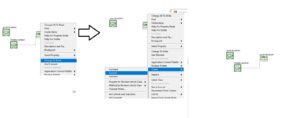
- To make them write mode press right on the mode here on visible mode and press on change to write to option.
- Through this process, a terminal will generate on the visible mode from where you can add the control tab.

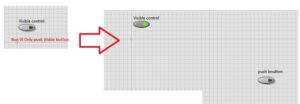
- If we run our program then the visible button will only be shown and the push-button will disappear so if during run VI press on visible button mean on it our push-button will show.

That’s all about the property nodes in LabView i have just explained one visible tab from property mode. There are different types of property mode that exist in LabVIEW through using them you can perform functions and make projects this tutorial will help you to have an understanding of other property modes. Thanks for reading have a good day.


