 How to Start a Blog, and How to Build a Blog Site are related questions and here we will discuss all steps involved in blog starting.
If you are thinking of making a blog and sharing your ideas to shares to all over the world then it is the best place where you come. So let’s get started with How to Start Blog
What is a blog post?
Teh blog post is an article, news or details that are uploaded to blog page of the website. The blog post normally provides details of certain topics and queries. It has an educational nature and is normally written 700 to 2000+ words and also has pictures videos and interactive charts. For uploading blog posts there is a need for a site.
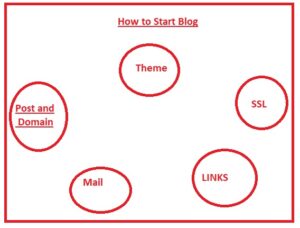
How to Start Blog
Blogging platform
Blog Name and Niche
Then choose the name and topics on which you write content. The name of the blog must be according to the content that you will publish since it directs your users to find relative details. There are different topics that you can cover for creating blogs such as travel, technology, fashion, etc.
Web Hosting
After the selection of a blog niche now choose a hosting platform. The blog is like other sites that need a host for handling the site visited. There are different hosting platforms available that you can choose according to your requirements and budget. The recommendation is that choose a hosting plan that can manage your site easily Some popular options include:
BlueHost
HostGator
GoDaddy
DreamHost
Set up and design of blog
- First, choose a blog template
- Add required pages such as blog, about us, contact us, home page, etc
- Index your site in search engines
- Make a logo for your blogs
Write your first blog post
- First of all, do keyword research for your topics.
- Then find the proper blog title
- Outline the main points
- Write the proper content
- Add images according to the content
- DO on-page SEO
- Publish blog post
Promote blog
- Social sharing
- Make blog newslestter
- Write on other sites and link to your content
- Write questions and answers on other forums for your content
- For fast growth of the site use paid ads
- Use new content formats
- Regularly upload posts for growing your blog
Do blogs make money?
- Bloggers make money with the use of different methods. Some needed more work and most earnings were based on site traffic and content uploaded. ot it is suggested to use different methods for making money
How do I start a blog with no money?
- Free blogger platforms like WordPress, blogger, and WIx provide some features and functions to start a blog. They can easily be for those who do not have technical skills and provide pre-made designs for starting blogs.
How to earn by blogging?
- Affiliate marketing:
- Physical or digital product offerings:
- Selling posts
- banner ads
How do I blog on Google?
- Sign in to Blogger.
- On the left, > Down arrow.
- Press New blog.
- Enter a name for the blog.
- Next.
- Select the blog address or URL.
- Click Save.
What kind of blogs make the most money?
- Food Blogs.
- Finance Blogs.
- DIY Blogs.
- Parenting Blogs.
- Health and Wellness Blogs.
- Technology Blogs.
- Travel Blogs.
Which platform to start blogging?
- WordPress is the best platform for bloggers who need to have complete control for their sites. It is an open-source platform and is used to make sites or blogs for free using WordPress.org or pay for a hosted WordPress.com site.
Is blogging still profitable?
- yes, they are still profitable and it is based on the niche that you selected since some niches have high traffic and chances of high earnings and low traffic will have low earnings. So choose niche that has high-traffic
What is vlogging vs. blogging?
- Through blogging, we write content-based text and articles, tutorials, and news. Vloging involves recording and uploading video content. If you prefer writing then blogging is the best option. if you are comfortable with the camera then using vlogging could be ideal.
How long is a blog?
- Some content marketing experts say that 1500 to 2000 words are best to write for the blog. But some older sites ranke in short length content (500-750 words). The best option is to write 1500-plus-word blogs