Hello, readers welcome to the new post. In this post, we will have a detailed look at PCB Creation From Base. The PCB Board is the simple and basic component of currently used projects and devices. It has become very common to us and is employed in every module. Numerous types of this board are used according to requirements and usage.
The common types of PCB boards are single-layer PCB double-layer boards and multiple-layer PCB. Each is employed according to use and project needs. In this post, we will cover details about the creation of PCB from basic to advanced level. So let’s get started with How to Make PCB From Scratch.
How to Make PCB From Base
- For the production of PCB board, there are basic elements and components of PCB are wires, Pads, and holes created to the circuitry.
- The use and creation of these modules is known as the PCB designing process.
- After doing the above explanation things you have to provide the design created to the manufacturer or make it own.
- It looks difficult but there is no need to be tension about it. I will introduce you to such techniques and tools that are free to use.
- Here are some steps that will help you to design your PCB board.
First Make Circuit design
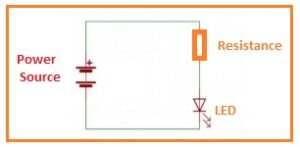
- Before making the connection of between wires and different components, we must need a circuitry that we are going to design and must a circuit diagram.
- The circuit can be created by its own or can be used to create by another person.
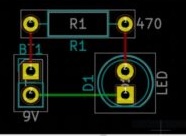
- Here I am using the circuitry of LED blinking that is very simple and its design is also simple to create.
Structure Creation
- Ist of all we are required to install or have PCB design software there are numerous free and paid software can be used.
- Here is I am using and also suggest to you Eagle software design creation that is simple to use and also free of cost.
- Make a new project in the software and after that create a schematic of the circuit that we have created or choose above.
- After the creation of the design shown above end it and simulate checking the faults that exist in our design.
Board Layout Designing
- This is 3rd step in which we will shift our schematic of the circuit that we created in the second step to the PCB board.
- It is a very simple step. since the design we created in EAGLE software has to be made on the board the software design will help us to create of connection of circuitry.
- Here the question will arise as that which type of footprint we should use there are two main types of footprint first one is the through-hole and the second one is surface mount.
- For soldering the through-hole technique is very easy to use. I suggest through-hole for you if you are a beginner and creating a project first time.
- After doing this use the Design Rules Checker to see the connection are made accurately.
How to Get PCB Created
- After the creation of designing or drawing of our PCB now, we have to get the design created. The PCB can be etched by its own but the simple and easy way is to use PCB manufacturers that can create your PCB easily and very effective way.
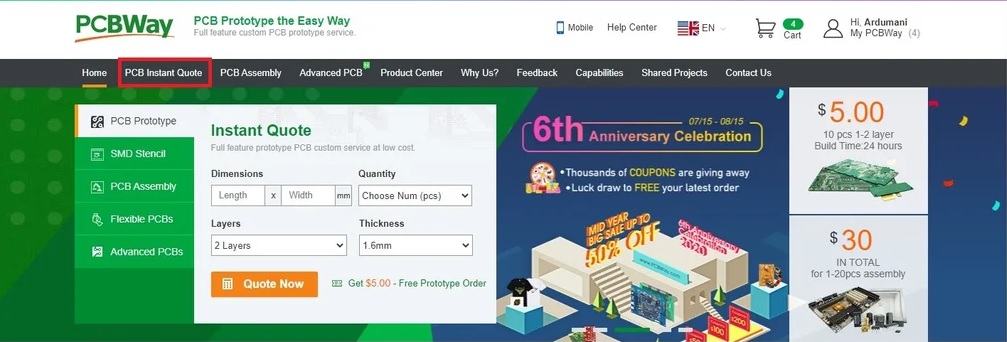
- It is not a costly process. For instance, there is such PCB manufacturer that can create your PCB at a reasonable price. You can get in just five dollars five pieces of board. It will provide relief for getting engagements with different hazardous and processes.
- The PCB manufacturer that here I suggesting to you is PCBWAY that is China-based and provides different services related to PCB.
- The simple and easiest method to deliver PCB board structure to the PCB manufacturer is just to make Gerber files of your design.
- But there is an option that some manufacturers also get KiCad files that is easy for you to send them directly.
Arrange All Components of the Project
- Then you send the design of the PCB to your manufacturers which is a time-consuming process.
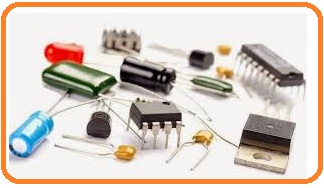
- So till your PCB is designed you must have to arrange and buy all components used in the project that you have to create on the PCB board.
Components Connection On PCB
- After getting the PCB from the manufacturer and buying the components used in the Projects there is the final step that to connect these components on the board.
- Ready your working table and arrange a soldering device.
- After that see the design of a project that we created in the above steps in Eagle software.
- Then connect the components of the project according to that design configuration and after final check make solder for permanent connection.
- Now our project is ready to work. This is a simple and easy project designed in this tutorial that will help to create complicated projects.
Read Also:
- What is Ball Grid Array (BGA) on a PCB Board
- How to Manufactured Large PCB Board
- Main Parts of PCB Board
- How to Reduce the PCB Board Size for Projects
- Types of PCB Board
- Flexible PCBs: The Future of Electronics Manufacturing
Faqs
How are PCBs made step by step?
- The main steps involved for PCB manufacturing are listed here.
- Step 1: PCB design
- Step 2: Design Review
- Step 3: OCB Design Printing
- Step 4: Printing the Copper of the inner Layer
- Step 5: Etch the Internal Layers
- Step 6: Layer Alignment
- Step 7:AOI
- Step 8: Laminating the PCB Layers
- Step 9: Drilling
- Step 10: Plating
- Step 11: External Layer Imaging
- Step 12: External Layer Etching
- Step 13: External Layer AOI
- Step 14: Solder Mask Apply
- Step 15: Silkscreen Application
- Step 16: Finishing
- Step 17: Electrical Reliability Test
- Step 18: Profiling and Route Out
- Step 19: Quality Check and Visual Inspection
- Step 20: Packaging
How are PCBs created?
What is the base of PCB?
How is PCB substrate made?
What is the chemical formula for PCB?
C12H10-nCln
What is PCB design tool?
The comonly used PCb design tools are schematic creation, layout design, trace routing, BOM validation, and design file production. The main parameters that define EDA tools is user interface, 3D visualization and routing and simulation features.