Hello readers welcome to the new tutorial. Here we will discuss LED Control Using Arduino. Arduino is a board that is used to control different projects and circuits through different pins. It comes with different types of pinouts that perform different functions. Such as analog pins digital pins and some others.
Here we will make a project using an Arduino board to control the operation of LED. So let’s get started.
Introduction to LED
- LED is a diode that emits light when current flows through it.
- It is constructed with the GaAs and GaP.
- It working operation is based on the conversion of electrical energy into light energy.
- Its reverse breakdown voltage value is less than the diode.
- LED uses less energy than a normal incandescent bulb, with less cost.
- It is employed in different areas, like the aviation industry, lights of vehicles, signal
- It does not need any backlight.
- Its switching speed is fast.
- There is no effect on the LED of DC current.
Working Principle of LED
- The LED stands for light-emitting diode and in the below figure, you can see the symbol of LED.
- The working of LED is very simple when led is in forward biasing conditions the electrons existing in the N side of the diode cross the PN junction and enter the P region combining with the holes existing in that region and emitting light
- As we discussed in the tutorial about atom there are two main bands of energy first one is the conduction band that has a large number of electrons, in this case, is N region.
- Second, is a valance band that is the P region of the diode and has holes in it. So when electrons move from high conduction band to the valance band or combine with the holes release energy in the form of light.
- The type of light emitted depends on the type of bandgap and other related parameters.
- A large visible area on a single sheet of the semiconductor substance allows the photons to be released as visible light.
- This procedure is known as electroluminescence and is described in the below picture.
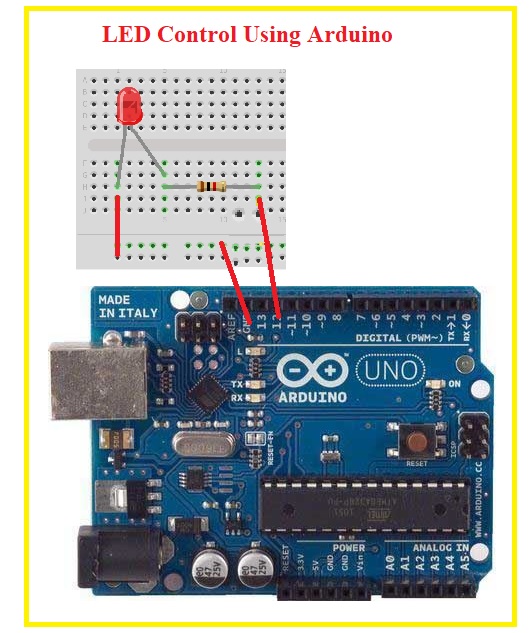
LED Control Using Arduino
- The components used in this project are listed here
- Breadboard
- Resistances
- LED
- ARDUINO
- Make the connection according to the configuration shown below.

- After that upload the code written below to arduino
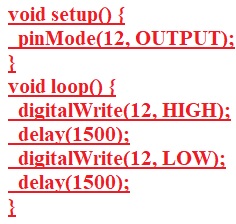
- The code shown in the above figure is discussed here
- Pin no 12 is used as output pins. LEDState function is used to show the state of LED that will be high and low after 1500 delay time.
That is all about the LED Control Using Arduino. I have explained this project in detail all codes and diagrams has been discussing. If you have any further queries ask in the comments. Thanks for reading
Read also:
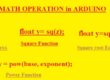
- HOW TO DO MATH OPERATION in ARDUINO
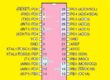
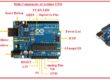
- Main Components of Arduino UNO
- Introduction to Arduino Diecimila
- GPS Tracker using Arduino
- Introduction to Arduino Mega 2560 Rev3