The best NiMH batteries for Arduino do not always come with the highest capacity. For different Arduino projects, stable voltage is more important than high runtime. Proper battery selection is important for making sensor nodes, robot data loggers, and portable controllers since batteries make their performance accurate and functional over time.
NiMH rechargeable batteries are the best option for Arduino projects since they are safe, commonly available, and provide constant current in moderate loads. But use of an improper battery causes resetting errors, wireless communication faults, low runtime, and troubleshooting.
In this tutorial we will cover details about how Arduino boards use battery power and NiMH batteries compared with lithium-ion and alkaline alternatives, which battery configurations are preferred for different Arduino projects, and how to prevent the most common power-related problems that affect stability and long-term performance.
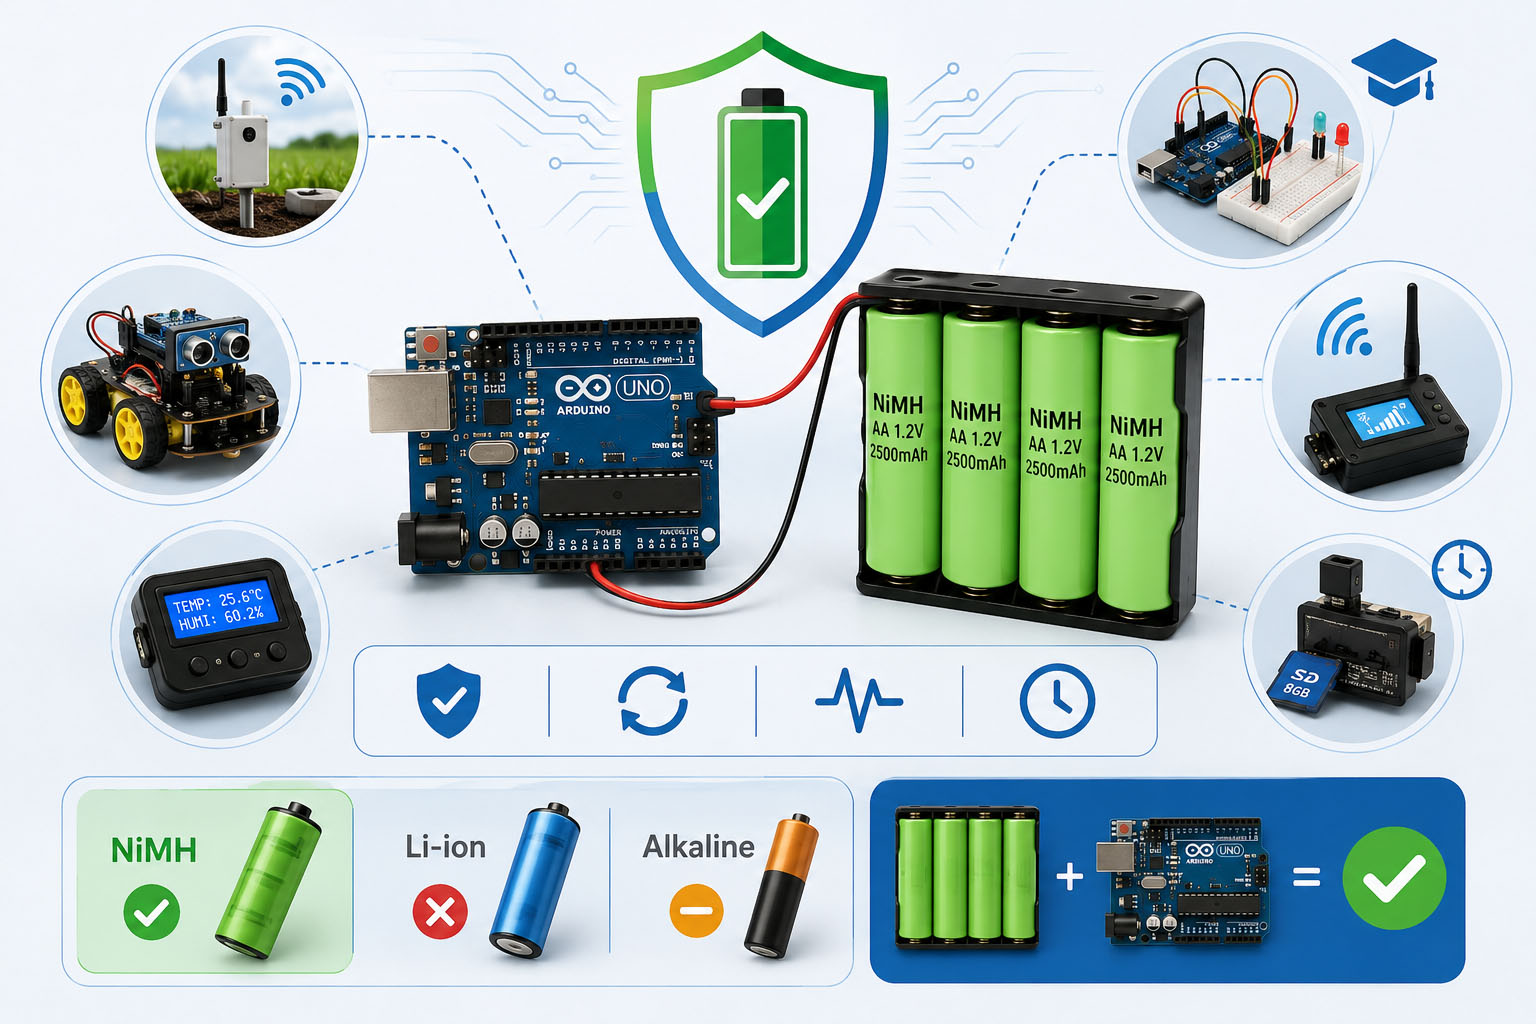
Why Battery Choice Matters in Arduino Projects
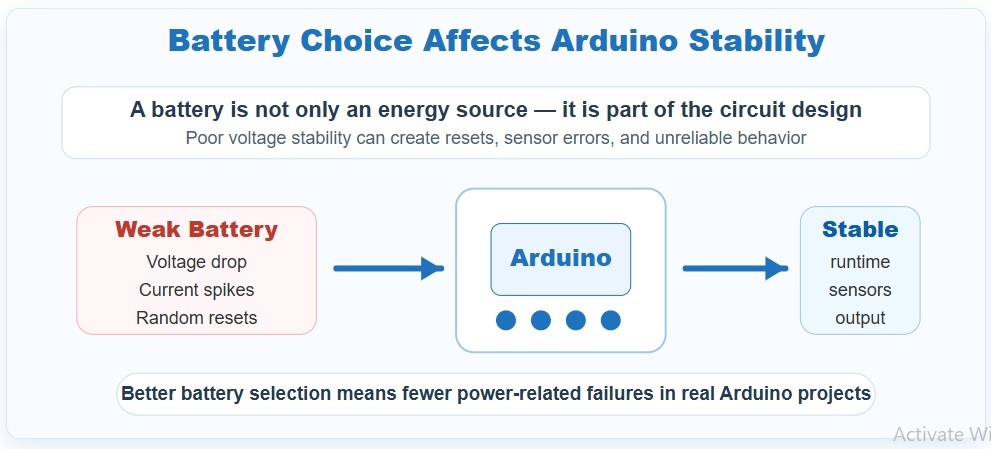
During the creation of Arduino projects, it’s best to work on sensors, code modules, and wiring through a working battery; this is also important. A battery is considered an important component of circuit design. If the battery is of low quality or does not meet the required specifications, it will negatively impact the functionality of the prototype.
There can be random Arduino resets that occur due to faulty sensor values, LED flickering, wireless module disconnection, or motor start and stop. It occurs with low voltage losses, low current strength or faulty battery chemistry. Arduino boards provide stable power since sensors, microcontrollers, and other devices work based on proper operating voltage. If battery voltage reduces when the motor starts or the WiFi module is transmitting data, boards can enter a brownout condition and restart. Therefore, selecting a battery for Arduino involves more than just choosing a high-capacity cell.
Capacity defines how much energy capacity a battery has but not the battery’s stable voltage during project conditions. For different beginners, educational seniors, and low- to medium-power-based projects, NiMH rechargeable batteries offer safety, reusability, and good performance.
Their management is easier than with lithium cells and best for testing compared to disposable alkaline batteries.
with that NiMH battery used with proper cell numbers, accurate input techniques and accurate charging features. Selection of an accurate battery helps Arduino projects work well, functions constantly, and prevents frequent troubleshooting occurring due to unstable power.
How Arduino Boards Use Battery Power
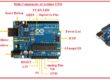
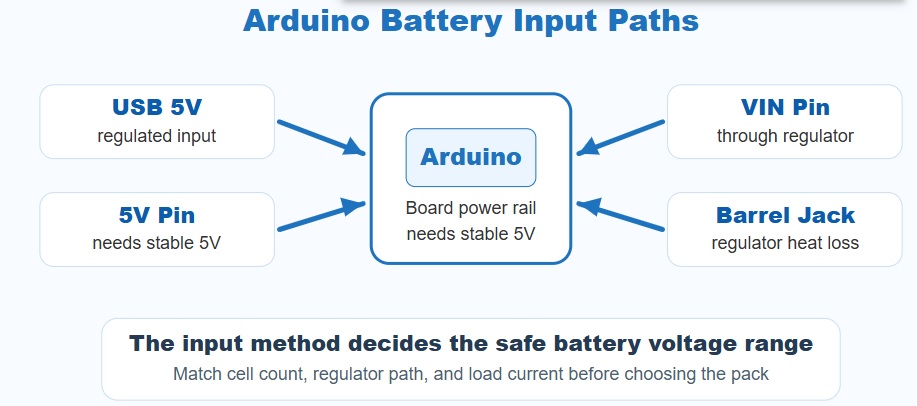
Before battery selection, there is a need for getting an idea of whether the Arduino board receives power. An Arduino is not powered in the same way through every input. The common power paths are USB 5V, the 5V pin, the VIN pin, and the barrel jack exist on boards like Arduino Uno. Each input has different voltage requirements and different levels of protection. so same battery pack m work well through one input but cause instability through another.
If we give power to board with usb arduino normally uses five volts. that best for programming, testing and low-power functioning that’s based on current limiting for USB sources.
The 5V pin also provides power to the board; that input is used for a stable, regulated 5V supply. If we connect an unregulated battery pack directly to the 5V pin, too high a voltage can affect the board, and low a voltage may cause resets.
The VIN pin and barrel jack deliver power with an onboard voltage regulator. That is best when battery pack voltage is high compared to 5V; that also causes energy losses in the form of heat.
such as for a high-voltage battery pack and regulator that come to reduce voltage value 5volts energy parts is heated than proper runtime. This is best in battery-powered Arduino projects, where every milliamp-hour matters.
So battery cell number is important; a 3-cell NiMH pack, a 4-cell NiMH pack, and a 5-cell NiMH pack do not work like when connected with Arduino inputs.
Use the battery feature based on board type, input connected sensor, and current requirements. Arduino power design is not to make battery connections randomly but according to battery voltage and load values so the board gets stable power throughout the project.
Can You Use NiMH Batteries for Arduino?
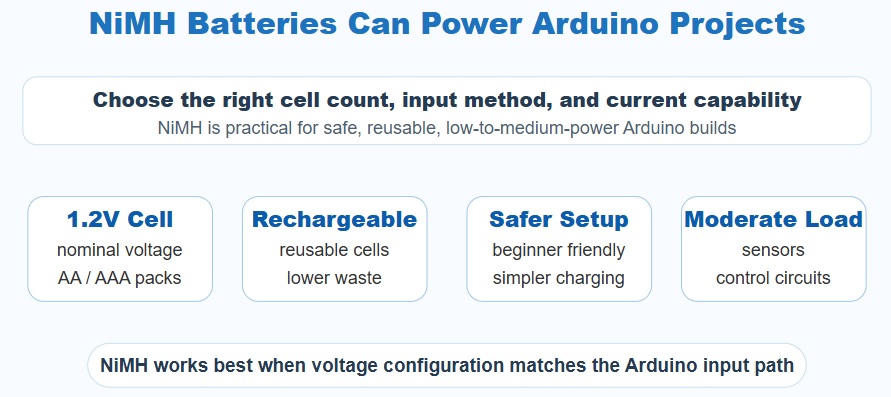
Yes, NiMH batteries for Arduino are the best option for projects where safety and easy battery replacement are important. A single nimh cell comes with a nominal voltage of 1.2 volts, so Arduino projects work with many AA or AAA cells in series to get usable input voltage. that make NiMH batteries best for using Arduino education kits, low-power controller sensor projects, portable test circuits, and many low-to-medium-current embedded systems.
Compared to lithium-ion or LiPo cells, NiMH batteries are easy for beginners to manage since they do not need the same protection circuit level, balanced charging, or strict safety management.
That does not show how NiMH can be employed improperly, but it makes for forgiving in classroom projects, hobby electronics, and repeated prototyping. If you are designing a project that will be tested, recharged, modified, and used many times again, NiMH cells are convenient compared to disposable alkaline batteries and less complex than lithium-based packs.
For projects that needed safe and replaceable cells, NiMH rechargeable batteries are used for educational electronics, embedded devices, and portable tools. They offer the best performance under moderate loads, especially when delivering microcontrollers, sensors, relays, and control circuits. AA NiMH batteries are used for longer runtime, and AAA NiMH batteries can be useful when the project needs to remain compact.
The main factors are using the accurate cell number and good Arduino power input. A 2-cell NiMH pack can be too low for many 5V boards without a boost converter, and a 4-cell or 5-cell pack may work better based on whether you use a regulated 5V input, VIN, or an external power module. NiMH is not automatically the best for every Arduino project, but for safe, reusable, and moderate-current projects, it is one of the best options. NiMH works well when the voltage design matches the Arduino input path.
NiMH vs Li-ion vs Alkaline vs 9V Battery for Arduino
There is not a battery chemistry that is best for each Arduino power supply design. The best option is based on current size, runtime, charging techniques, safety level, and circuitry used by beginners or experienced developers. A small desk prototype can often operate from USB power, but a real battery-powered project needs a proper, careful decision. So comparing NiMH, lithium-ion, LiPo, alkaline, and 9V block batteries is best before you build the final circuit.
| Battery Type | Voltage | Best For | Main Risk |
|---|---|---|---|
| NiMH AA/AAA | 1.2V/cell | Sensors, Arduino kits, low-to-mid power projects | Lower voltage per cell |
| Li-ion / LiPo | 3.7V/cell | Compact high-energy projects | Needs protection circuit and regulator |
| Alkaline | 1.5V/cell | Short tests and simple experiments | Voltage sag, not rechargeable |
| 9V Block | 9V | Very light loads only | Poor current capacity |
NiMH batteries are not a common energy-dense option but are a common choice for Arduino beginners and educational electronics. that can be recharged many times and come in AA and AAA formats and do not require the same protection features as lithium-based cells. For projects that employ sensors, relays, small displays, and basic control circuits, a correctly used NiMH pack can offer a good balance of safety and reliability.
Li-ion and LiPo batteries are best when a high energy density for small packages like compact devices, wireless products, or projects where size and weight matter. However, they need a protection circuit, a charging module, and voltage regulation. It provides complexity and enhances the risk of errors if the project is handled by beginners. Alkaline batteries are simple and low-cost for short experiments, but their voltage can sag fast under load, and they are not a low-cost option for repeated testing.
The basic rectangular 9V battery is often misunderstood. Although its voltage is best for Arduino boards with a barrel jack or VIN input, most small 9V blocks have poor current characteristics and limited capacity. They deliver power in a simple blink test, but they are a weak option for sensors, motors, wireless modules, or embedded projects. For different practical Arduino projects, like those where safety and repeated use are important, NiMH is a sensitive choice as long as the voltage setup is planned properly.
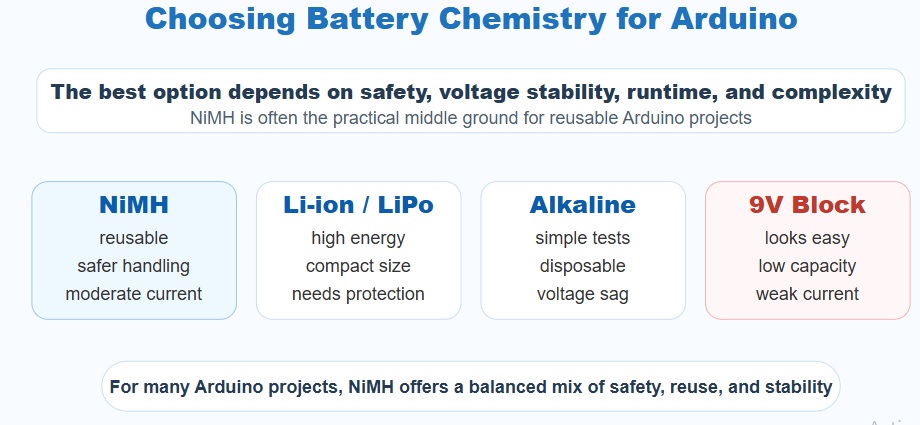
Figure 4. NiMH, lithium, alkaline, and 9V batteries each have different strengths and limitations when used as an Arduino power source.
Best NiMH Battery Configurations for Arduino Boards
A basic question for Arduino battery projects is whether you should use three, four, five, or six rechargeable AA NiMH cells.
Answer based on the Arduino board, input path, and load connection with the circuit. the 3 cell nimh pack give 3.6volts that best compact boards or regulated design, there is low for standrd 5v arduino setup witjut boost converter.
A 4-cell NiMH pack gives about 4.8V nominal voltage and works best when the circuit is designed over a stable 5V rail or a proper regulator.
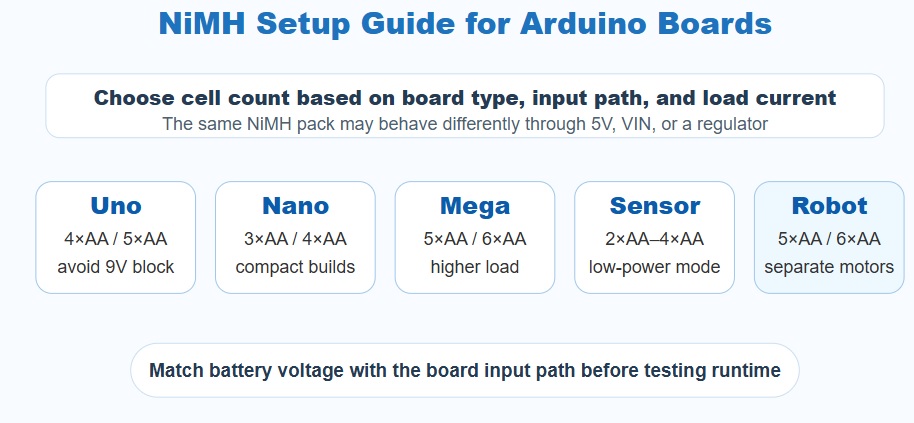
For an Arduino Uno, 4×AA or 5×AA NiMH cells are often better compared to a small rectangular 9V battery. A weak 9V block provide enough voltage on a meter, but it often cannot give required current once sensors, LEDs, displays, or communication modules are added. For an Arduino Nano, 3×AA or 4×AA NiMH may work well when the power path is properly regulated. For an Arduino Mega, which is compatible with more modules and has a higher current demand, a 5×AA or 6×AA NiMH pack with a good regulator is usually more realistic.
| Arduino Board | Suggested NiMH Setup | Input Method | Notes |
|---|---|---|---|
| Arduino Uno | 4×AA or 5×AA NiMH | 5V pin / VIN depending setup | Avoid weak 9V blocks |
| Arduino Nano | 3×AA or 4×AA NiMH | 5V pin or regulated input | Good for compact projects |
| Arduino Mega | 5×AA or 6×AA NiMH | VIN / regulated supply | Higher board current |
| Sensor node | 2×AA to 4×AA NiMH | Regulator depends on design | Low-power mode matters |
| Robot car | 5×AA / 6×AA pack | Motor driver + regulated Arduino rail | Separate motor power preferred |
For Arduino sensor nodes, low power mode is more important than raw battery capacity. Properly optimized sensor nodes run longer on a small NiMH pack compared to a badly optimized circuit with a larger pack. For Arduino robot cars, motor load is connected with the main fault. The motor makes current spikes that are best for separating the motor supply from the Arduino logic rail and employs a regulator for the board. This manage motor startup from pulling down the microcontroller voltage and resultin resets.
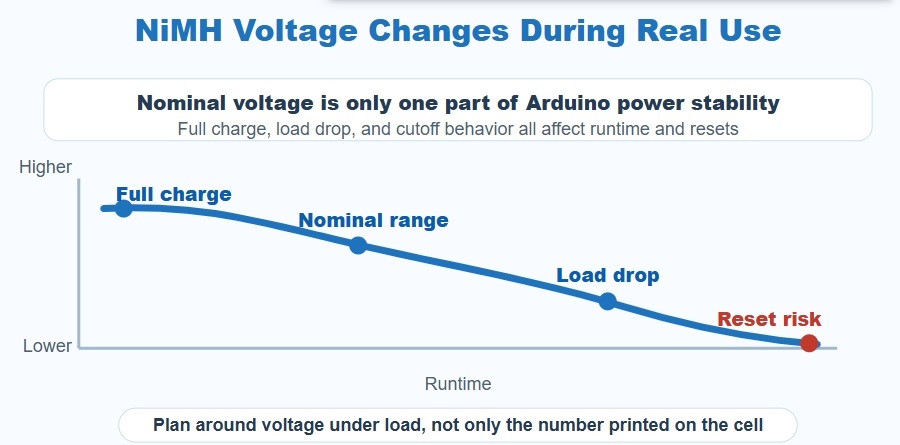
NiMH Voltage Behavior: Why Full Charge and Cutoff Matter
Different Arduino battery detils over nominal voltage for nimh cells, with real battey feature is high dynamic.
An NiMH cell is best defined as 1.2 V nominal, with actual voltage value variations when charging, resting, and discharging. A fully charged cell shows high voltage compared to 1.2 volts and voltage losses when the cell discharges.
In an abrupt load, like a motor start or wireless transmission, voltage reduces for a short time. If the dip is less than the required level of the Arduino or regulator, the project can also reset if the battery is not empty.
So NiMH voltage behavior is important in real Arduino projects. A battery pack that is acceptable with no load can work differently when sensors, displays, relays, servos, or communication modules are active. For example, a 4×AA NiMH pack can be close to a usable voltage range for some designs, but if the pack is old, faulty charged, or under heavy load, the voltage can lie low enough to cause instability. This is also best for battery-powered sensor nodes and portable Arduino devices facing to run without any working
The charging feature is also important. NiMH batteries should be charged with a proper charger that can check a full charge and stop or reduce the charging current correctly. Bad charging control can cause overheating, overcharging, reduced capacity, and a shorter working life. Due to NiMH voltage varying during charging and discharging, understanding NiMH battery charging voltage helps in managing overcharging and early capacity loss.
In practical Arduino applications, you should not check NiMH packs only by their printed capacity. Check the number of cells, required load current, regulator efficiency, charging process, and minimum voltage the board can tolerate. If your project resets close to the end of runtime, the battery may not be faulty; it may just simply be at the point where voltage under load is no longer high enough. Designing around full-charge voltage, normal discharge voltage, and low-voltage features makes Arduino projects much more reliable.
How Long Will NiMH Batteries Power an Arduino?
When you build a battery-powered Arduino project, the runtime is the best point. not asking the capacity of the battery but how much longer the supported circuit works in working conditions. The basic method to estimate runtime is simple. You can think of it as dividing the battery capacity with the average current use of your system. This provides a realistic starting point before you test the actual hardware.
In real NiMH battery Arduino projects, current draw is not always constant. Sensors are idle most of the time, WiFi modules can transmit in bursts, and motors or relays may only activate occasionally. So your actual runtime can be different from theoretical calculations. However, the formula below gives proper engineering baseline to plan your design before building and testing.
This means a 2000mAh AA NiMH pack running a 50mA load can theoretically work for 40 hours. If the project is using 100mA, runtime becomes about 20 hours. At 200mA, we may only get around 10 hours of operation. Higher capacity cells such as 2500mAh NiMH batteries enhances runtime proportionally, but real-world working will still be based on voltage stability, regulator efficiency, and load.
The best is that runtime is affected by some other factor like voltage conversion efficiency, sensor duty cycles, wireless transmission bursts, WiFi or Bluetooth modules, and motor load spikes. For example, an Arduino sensor node uses very little current most of the time but spikes during transmission, while a robot car faces abrupt current surges when motors start.
Common Arduino Power Problems Caused by Wrong Batteries
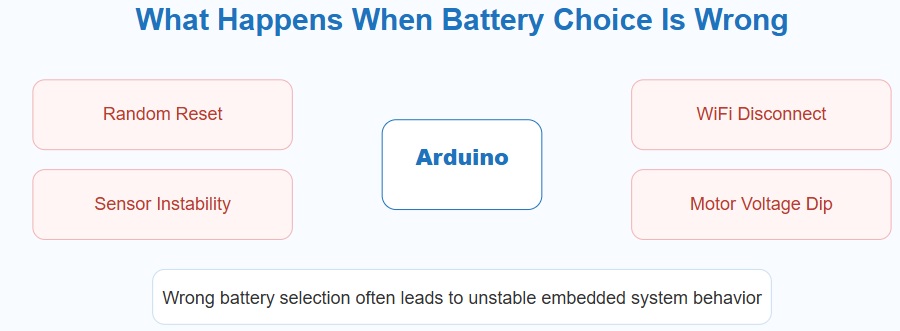
Different Arduino power issues do not occur through code or hardware defects but with an incorrect battery used or poor power design. When the battery does not deliver a stable current or maintain voltage under load, the complete system becomes unstable. This is common in projects with motors, wireless modules, or different sensors running at the same time.
The main signs are random resets where the Arduino restarts unexpectedly, unstable sensor values that vary without reason, and WiFi modules disconnecting during data transmission. You can also notice motor startup voltage dips where the board resets when the motor starts spinning. In some conditions, the voltage regulator becomes overheated if it is forced to lose high voltage from an inefficient battery pack.
Another fault is battery pack imbalance, especially in multi-cell configurations where cells age differently or are not charged properly. This causes uneven voltage distribution and unpredictable working. Using the wrong charger can also affect battery life or cause incomplete charging, which reduces available capacity and increases instability during operation. Different Arduino power issues do not occur through code or hardware defects but with an incorrect battery used or poor power design. When the battery does not deliver a stable current or maintain voltage under load, the complete system becomes unstable. This is common in projects with motors, wireless modules, or different sensors running at the same time.
The main signs are random resets where the Arduino restarts unexpectedly, unstable sensor values that vary without reason, and WiFi modules disconnecting during data transmission. You can also notice motor startup voltage dips where the board resets when the motor starts spinning. In some conditions, the voltage regulator becomes overheated if it is forced to lose high voltage from an inefficient battery pack.
Another fault is battery pack imbalance, especially in multi-cell configurations where cells age differently or are not charged properly. This causes uneven voltage distribution and unpredictable working. Using the wrong charger can also affect battery life or cause incomplete charging, which reduces available capacity and increases instability during operation.
Best Arduino Project Types for NiMH Batteries
When using NiMH batteries for Arduino projects, it is best to configure the battery type with the real condition rather than treating all projects the same. NiMH works best in stable, moderate-power conditions where safety, reusability, and predictable voltage changes are more important than high energy density. In educational conditions, sensor systems, and simple embedded builds, NiMH is the best practical and reliable option.
For classroom Arduino kits, NiMH batteries are best because students can easily reuse and recharge them repeatedly without complicated battery management systems. For remote sensors, low self-discharge NiMH cells help provide stable operation for a longer time with less maintenance. In data loggers, constant voltage output is more important than peak capacity, making NiMH a reliable option for continuous measurement operations
In simple robot projects, NiMH packs can provide proper current for motors when properly configured with the required number of cells. For wireless controllers, stability is more important than raw energy density, and NiMH provides predictable working under moderate load. In LED projects, voltage stability offers consistent brightness without flickering through voltage drops. For low-power IoT nodes, NiMH can be used effectively when sleep modes and duty cycling are properly designed.
When NiMH Is Not the Best Choice
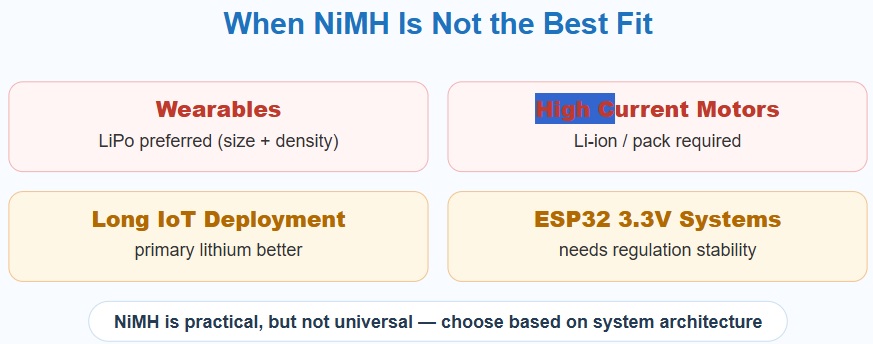
Although NiMH batteries for Arduino are commonly used, they are not the best option for every type of project. In some cases, different battery chemistries are best based on size constraints, current demand, voltage requirements, and long-term application conditions. Using the right chemistry is just as important as using the correct circuit design.
For ultra-compact wearable devices, LiPo batteries are better since they give high energy density in a very small form factor. For high-current motor systems, Li-ion or dedicated battery packs are used to handle large current spikes without voltage losses. In long, unattended IoT deployments, primary lithium batteries can sometimes be the best due to their very low self-discharge and long shelf life.
In systems using ESP32 or strict 3.3V designs, voltage regulation becomes important, and NiMH packs must be properly managed with step-down or regulation circuits to avoid instability. In these conditons, battery selection must be operated with system design rather than convenience or availability.
How to Choose the Right NiMH Battery for Arduino
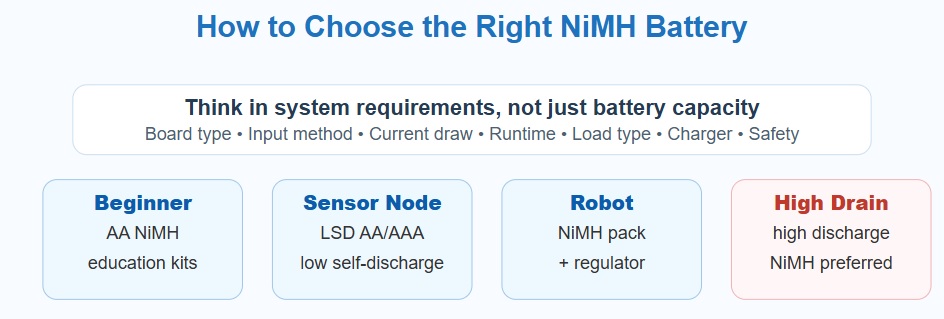
Selecting the required NiMH battery for Arduino projects is not about picking a capacity value. You should check multiple system parameters together to ensure stable performance. The most important points are board type, input process, current draw, expected runtime, load connected, charger quality, and overall safety requirements. Each of these factors affects how well the Arduino system works in real-world conditions.
For beginner or educational projects, standard AA NiMH batteries are normally a good choice due to their safety and simplicity. For portable sensor systems, low self-discharge (LSD) AA or AAA NiMH cells are used since they hold charge longer during idle periods. For robot projects, NiMH battery packs combined with proper voltage regulation offer proper current stability for motors. For high-drain applications, high-capacity or high-discharge-rate NiMH cells are used to maintain voltage stability under load.
so, the best method is to handle battery selection as part of system design, not an afterthought.fulfiling the proper chemistry and design ensures that Arduino project runs reliably, avoids resets, and performs regularly for different operating conditions.
Frequently Asked Questions (FAQ)
Can I use NiMH batteries for Arduino?
How many AA NiMH batteries do I need for Arduino Uno?
Is a 9V battery good for Arduino?
Are NiMH batteries better than Li-ion for Arduino?
What is the best rechargeable battery for Arduino projects?
Why does my Arduino reset when powered by batteries?