Mold is a common fault for different homes, especially in locations where high moisture exists with improper airflow. Mold is also connected with damp drywall or carpets, which also grow over hard surfaces like concrete, tile, and sealed wood. That good feature is that small mold errors over hard surfaces can be managed safely; we can do it ourselves. Getting to know how cleaning mold helps to protect the home, health, and indoor quality.
This tutorial explains when DIY mold removal is accurate, how to perform it safely, and how to avoid mold creation.
What Causes Mold Growth on Hard Surfaces
Mold grows when moisture and organic materials exist. Also, hard surfaces that do not absorb water, such as drywall and fabric, still grow mold over dust, soap residue, and grime collecting on them. Kitchens, bathrooms, basements, and laundry rooms are common points where that occurs,
leaking, high humidity, bad ventilation, and standard water cause the best conditions for mold growth. If moisture faults are not solved, mold continues to return, which does not affect how clean the surface is.
Safety Precautions Before Removing Mold
Before starting mold cleaning, safety comes first. Mold releases small spores in the air that affect lungs, skin, and eyes. With that, small mold patches needed to be handled properly.
Use proper gloves on skin and a mask to prevent breathing in spores. Eye protection is also needed during scrubbing. open window or fans used for enhancing airflow during cleaning. Do not mix cleaning materials, since it causes harmful fumes.
If mold covers a larger part or results in health issues, DIY removal will not work.
Tools and Supplies Needed for DIY Mold Removal
- There is a need for certain devices for removing minor mold from hard surfaces. Some of the best tools exist at home. Basic tools are gloves, masks, scrub brushes, sponges, and clean cloths. Spray bottles help to use cleaning solutions.
- Do not use abrasive tools that affect the surface, do not use dry brushes since they spread mold through the air. always used amp cleaning techniques for controlling dust and spores at the time of cleaning
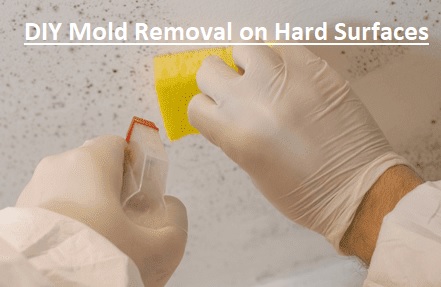
Step-by-Step DIY Mold Removal Process
Step 1 – Area preparation
- First of all, clear the area over the mold. Remove personal products, rugs, or decorations so as not to become contaminated. If it is sure to close the door for spores, keeping them from moving to other rooms. Check that locations are accurately ventilated when you start.
Step 2 – Use Cleaning Solution
- Spray cleaning solution over the moldy area. The check area is completely covered but not soaked. Allow the solution to configure for some time. That helps break down mold and loosen it from the surface and provides effective scrubbing.
Step 3 – Scrub and Rinse
- apply scrub brush or sponge for slowly scrubbing mold away. Work on corners, grout lines, and texture points where mold needs proper cover. When scrubbing is completed, clean the area. A damp cloth for residue removal. Use new clothes for controlling spreading mold
Step 4 – Dry the Surface Thoroughly
- Drying is the main factor for model removal. Apply clean towels, fans, or dehumidifiers for removing moisture. Mold increases in damp conditions, so making surfaces open and wet increases the regrowth.
How to Remove Mold From Specific Hard Surfaces
Mold on Tile and Grout
- Tile has resistance to water, but grout is porous and gets moisture. Mold normally shows in showers and bathrooms. Extra scrubbing is used for grout lines. When cleaning is performed, make the area dry and properly ventilated. avoids mold recreation
Mold on Concrete and Stone
- Concrete and stone are solid and absorb moisture. Mold over basement floors is common after leaking. Cleaning occurs with drying. The help of a humidifier for the basement can reduce mold creation
Mold on Sealed Wood and Laminate
- Sealed or finished wood surfaces are preferred for DIY mold removal. Mold for soft wood passes deeply into materials.
- If wood is soft, warped, or discolored after cleaning, professional help is needed to avoid structural damage.
Main DIY Mold Removal Mistakes to Avoid
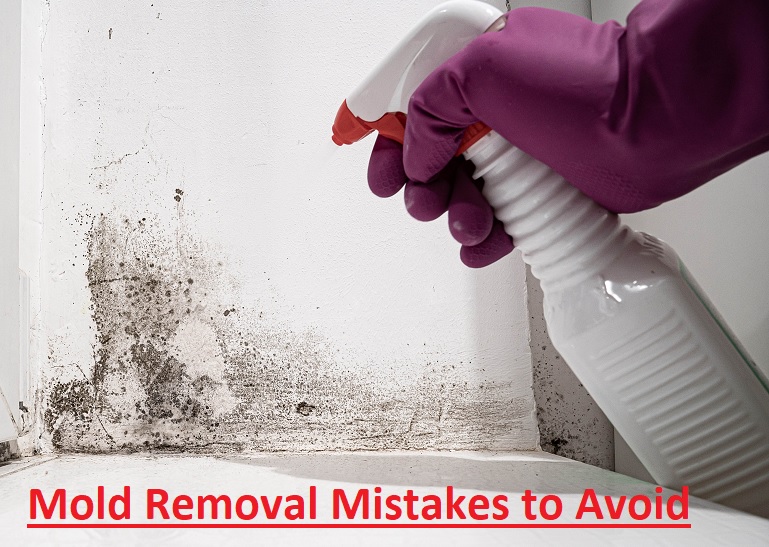
The main error is the use of a high quantity of water. Since high moisture spreads mold and causes problems. Other common faults are not considered moisture sources. Cleaning without solving leaks or ventilation causes temporary outcomes.
Do not make mixture cleaning products like those that come with ammonia and bleach. that make toxic fumes. Painting over mold without cleaning is not effective and makes mold grow too deeply.
How to Stop Mold From Coming Back
Stopping mold is easy compared to removing it. Keep indoor humidity level low with the help of exhaust fans, window opening, and dehumidifiers running at the time of need.
Solve the leak shortly when you also find the small part. Proper cleaning prevents mold from getting a foothold. Clean damp locations and dry surfaces after using. Proper airflow and moisture control are the best long-term mold prevention techniques.
When DIY Mold Removal Is Not Enough
DIY removal is working better in small, visible mold patches. If it covers a larger area, maintain returning or look to walls or ceilings; professional mold remediation is important. A strong smell, worsening allergies, or breathing problems are also signs that mold can affect indoor air quality.
For these conditions, a professional comes with tools and experience for removing mold safely and completely.
Conclusion
DIY mold removal on hard surfaces is best when accurately performed. Small mold faults are managed with accurate cleaning, protection gear, and moisture control. The main working early and solving causes moisture, not mold.
Through following proper steps and controlling strategies, homeowners can easily predict property minimizes health chances and create a clean and safe environment.